
Pi Hole Your Life
These days most of us use some form of an ad blocker on our web browsers (if you don’t already, uBlock Origin is the place to start). Ads are not only annoying but at times, malicious. It is a good basic security practice to use one on your devices that support it. Unfortunately, when it comes to our mobile devices or smart TVs as an example, there is no / little support for extensions or applications that can perform the same job unless you are prepared to play around with rooting your device or setting up something further upstream.
This is where Pi Hole comes in. Pi Hole is a network wide ad blocker. The typical scenario I think most people use is having a Raspberry Pi connected to the home router which allows the software to sinkhole ads before they reach any device on the network. As the documentation mentions, despite the name, you can run Pi Hole on hardware other than the Raspberry Pi. That being said, this is the most common use case and is the implementation I chose.
Without further ado, this was the process I went through to get Pi Hole set up on my home network:
First and foremost, I bought a Raspberry Pi from one of my local tech stores. The model 3B+ had just been released which while not necessary for this operation, is nice to have in case I want to use it for other projects. The 3B+ does support PoE (power over ethernet) with an extra module, so this may be of use to some who are fans of having less cables.
For the software, I used Windows 10, 7Zip and Win32DiskImager (to write the image to the SD card). I chose Raspbian for my system image (many other Linux distros are supported). The Raspberry Pi Raspbian images can be found here.
When the image has downloaded, there’s a tool on Windows to check the SHA256 checksum. If you open the command prompt on Windows (thanks to this superuser post) and type certUtil -hashfile pathToFileToCheck [HashAlgorithm] where the hash algorithm is SHA256 in our case, it will confirm the checksum which you can check on the Raspbian download page. This is to ensure the image has not been corrupted in anyway. This is an optional step but more important for Raspberry Pi users as the integrity of the image is paramount for a working boot. There is no BIOS screen to throw an error, all the requisite information is on the SD card.
If you have a working SD card with a valid image, the Pi should boot once it has power. Once it’s up and running, all you need to do is go through the short install procedure found on the Pi Hole site. There is a more in depth guide here if any of the setup steps have you confused, but I recommend going through the official guide first. The only real choice you have to make is who you decide to choose as your upstream DNS provider (unless you follow Scott’s post for using DNS over HTTPS linked below). Personally, I use Cloudflare, but I’ve seen many choose Quad9.
If you’re security conscious or don’t like the idea of your ISP seeing your DNS queries, see a guide from Scott Helme about securing your admin page with HTTPS and using Cloudflare to encrypt your DNS queries. The guide is good but at the time of writing, slightly out of date. The only thing I found that differed was that the dnsmasq service been replaced in PiHole version 4 by FTLDNS.
As a helpful commenter points out:
For those that ran into the same issue as me setting this up with PiHole 4.0,
dnsmasqhas been replaced withpihole-FTL: blog post. So when you come to restartingdnsmasq.service, you instead want to restartpihole-FTL.
Update 3/19
After a pihole upgrade, an important configuration file at /etc/dnsmasq.d/01-pihole.conf was reverted to its default settings. This causes DNS problems. We have to add a line here (and each and every time we upgrade as far as I’m aware at this point in time). Here is the fix from another helpful commenter:
When I upgrade my Pi-hole, /etc/dnsmasq.d/01-pihole.conf got overwritten with a new default file. Value ‘server=127.0.0.1#54’ must be added again and pihole-ftl service must be restarted. After that my Pi-hole started resolving again. Perhaps it helps someone else out there.
Lastly, as the Pi Hole will probably be sitting connected to your router without any inputs or screen, enable SSH in the Raspberry Pi settings so you can remotely connect to the Raspberry Pi and update Pi Hole. The ad-blocking lists can be updated via the web interface or command line.
Once you’ve enabled SSH, you can go to a standard Linux terminal (default on your Linux distro and Mac or use the Windows Subsystem for Linux on PC) and login with ssh pi@[The IP address of the Pi] and then enter the password you set for the Pi. If you’re on an Android smartphone, you can use a terminal emulator called Termux to perform the same operation.
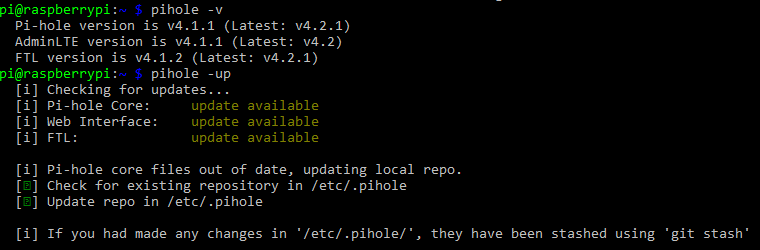
You can access the Pi Hole options by typing pihole into your terminal. From there, pihole -v will check your version (alternatively the web interface will tell you at the bottom right of the page if an update is needed). To update, pihole -up will update all of the components.
Updating Pi Hole
To access the Pi Hole admin interface, go to a browser and type [the IP address of the Pi]/admin or alternatively (if your Pi is acting as your DNS server), pi.hole/admin. Here you can see the statistics of how Pi Hole is performing.
Pi Hole admin interface
And that’s it for the software side of things. Plug the Pi into your router and go about your day knowing your life at home will be mostly free of ads. One thing I should note is that you can find further ad blocking lists over the web if you’re still getting the occasional ad. Adding those extra lists can be done over the web interface quite easily.
For my Raspberry Pi, I use a Flirc case which is an all-aluminium case and uses a thermal pad to aid the passively cooled CPU by drawing the heat and dissipating it around the surface area of the case. I’m writing this in the heat of the New Zealand summer and my Raspberry Pi is stable at around 40 - 45 degrees.
I did have one small issue with my Pi. As I was installing Pi Hole for the first time, my Pi was unceremoniously yanked from my desk by an angry cable and promptly power cycled. This in turn resulted in the Pi no longer booting. I tried all manner of fixes from the forums and elsewhere on the web. New SD cards, new power supply’s, left it for a week to reset the fuse/s. Nothing worked. I ended up buying a new one which worked perfectly. So, while this is no fault of the Pi Hole software, do be careful.
If you want a more detailed analysis on the benefits of using Pi Hole on loading times, bandwidth and removing the advertising load, see Troy Hunts post. He goes into great detail and writes better than I could.
Leave a comment